Glen & Kris


Concrete

Footings

Click a link to play the video:

  1. Footing forms ready for concrete (00:15).
  2. Placing concrete in the forms (01:04).
  3. An overview of the completed footings (00:28).

(Video caption)

Foundation

Click a link to play the video:

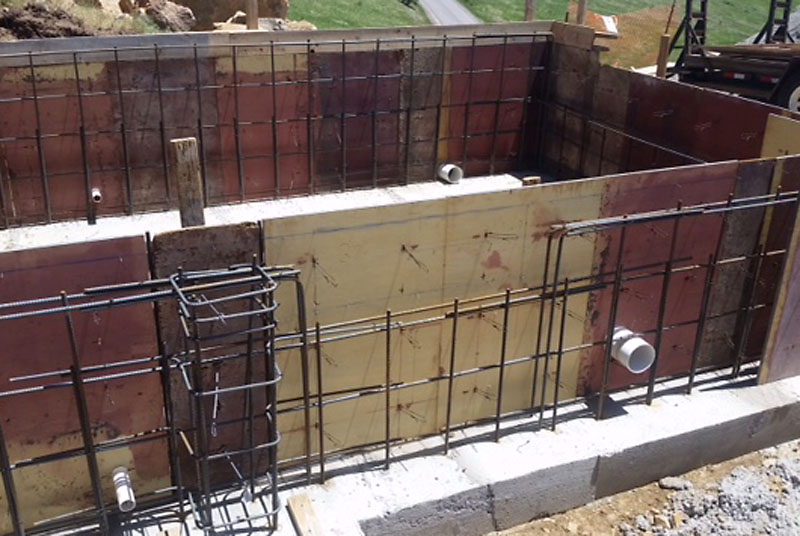
  1. Foundation forms and steel being erected — a view from the south (00:19).
  2. More foundation forms and steel — a view from the north side (01:02).
  3. A time lapse of placing the concrete (01:53).
  4. An overview of the completed foundation (00:16).

(Video caption)

Here are some stills showing the foundation during the construction of forms, placing the concrete and after the forms were removed.

The west and north side of the west carport retaining wall is shown here. The carports are about 8 feet shallower than the width of the house. The north wall is shown here. It is 14 feet tall. Workers are beginning to enclose the steel rebar with the second side of the forms. The east carport is visible here. This is a view just inside the garage looking at the east carport. Pass-throughs for sewer and propane are visible near the bottom of the foundation forms in a total of four places. Workers started placing concrete in the northeast corner then worked clockwise across the back wall. A small amount of concrete can be seen leaking between the form panels, so a concrete worker is tapping the joints to tighten them. The man right behind the one operating the concrete pump nozzle has a vibrator that is lowered into the wet concrete to help with compaction. A view of the concrete pump truck looking south over the building site. Workers are waiting for the last concrete truck to arrive. These steel plates were embedded in the wet concrete on the top of the walls. Brackets for various timber frame elements will be welded to these plates when the timber frame is erected. Here is a view of the new foundation walls one day after the forms were removed. Another view of the foundation showing the counterfort on the north wall. A heavy rain storm that just passed over us is visible in the eastern background. <span class='myGreyFont'>[End of series.]</span>

Garage Slab

Click a link to play the video:

  1. An overview of the finished garage slab (00:15).
  2. A time lapse of pouring the garage slab (01:00).

(Video caption)


Here are some pictures of the garage slab.

This is a picture of the SW corner of the garage floor before the concrete slab was poured. The level inside the foundation was brought up with compacted structural fill, then gravel was used to create a base for the concrete. A 6" pipe with air vents is buried around the inside perimeter of the foundation within the gravel for a future radon gas venting system if one is required. Two inch thick blue foam is sitting on top of the gravel, then a 15–mil yellow polyethylene vapor barrier covers that and is sealed with red tape. Six–inch welded wire fabric is placed to reinforce the slab, then Pex tubing for raidant heat is secured to the wire with ties. Here is another picture before concrete. The 6'–long trench drains are covered with plywood caps to keep the concrete out. The areas outlined in paint in the center of the photo with "NO" in them are exclusion zones that will let me bolt an auto lift to the floor in an area clear of the radiant heat tubing. The slab has been poured. The three diamond–shaped cutouts provide access to footings for steel posts that will support a beam running the length of the garage. Once the posts are set, the voids will be filled with concrete and surround the posts. This footing for the NW corner of the front deck was poured at the same time as the slab because the fill in this area was only recently completed. <span class='myGreyFont'>[End of series.]</span>


Return to the New House page.